Doesn't matter how smart it is. Your phone is a phone. My iPhone 6 takes decent snapshots and even better video. I know some of the Android phones take even better pix. But they're still just phones. A compromise. Great for selfies or, in my case, snapshots of handguns for my @dailyhandgun Instagram account. Great for capturing your drunk buddies being asinine. But never great for photography.
Two nights ago I told Chad Campbell I was going to bug him to write an article on arachnid photography for the BTS Journal. In typical Chad fashion he replied, "Quit using your cell phone and practice, practice, practice. End." You gotta love the guy. He doesn't waste words.
Chad's a busy guy. He has the important work of ensuring that I don't violate the fascist micro rules of the Arachnoboreds, he's an admin on various social media cesspools and he's out there practicing, practicing, practicing. He isn't going to mince words. Quit using your cell phone.
You can't get good results from even the smartest PHONE and you can't get great results from a point and shoot. Save your pennies. Buy a DSLR. Start small. For 500 bucks you can get a Nikon D3300 with a 18-55 kit lens from bhphotovideo.com (my preferred photography source). This camera will even shoot 1080p HD video and is 24.2 megapixels. The lens will at least get you shooting. Re-read my aperture blog. After getting used to the camera in auto mode set that dial to "A" (aperture priority). When in doubt, always use f/8. If you're doing portraits use the largest aperture (smallest f/stop number) possible that allows for everyone to be in focus (e.g., f2.8, f/4 even f/5.6). When doing landscapes use f/8 or f/9 for most shots. And, again, when in doubt, use f/8. If you're trying to get more detail in focus (greater depth of field) for herp or arachnid shots try to use smaller apertures like f/9-f/16. Get comfortable with your camera and, in the words of the prophet Advan, practice, practice, practice. Search YouTube for a lesson on how to make your own diffuser for that crappy pop-up speed light on the camera body. In the meantime, save more pennies.
OK, so you've got used to your DSLR and you've been saving pennies. Sell some blood or sperm. Deliver a few pizzas. Sell off a few of your spiders. You've got too many. Now you need a real lens. You need a macro lens. You need a 1:1 macro lens. You need the Tokina 100mm f/2.8 AT-X M100 AF Pro D Macro Autofocus Lens for Nikon AF-D. It's a steal at $379 with free shipping. Now you've got a rig to capture quality images of arachnids and herps. But don't forget the practice, practice, practice. You can't buy quality images. You can spend thousands on photo gear, but you have to learn to use it. YouTube. So much free instruction to view. Then get out there and actuate that shutter. You're not paying for film. Click, click, click.
Oh, but now you need light. You need off camera speedlights with diffusers. My lighting Photography 101 blog is still to come. I will cover my use of a ring flash and a speedlight with a large softbox. I will cover the twin mini speed lights and diffusers on adjustable arms that Chad uses. There is no rush though. First you have to practice, practice, practice with your new DSLR. If you have a few extra pennies move up to the 5000 series and look at the 5300 or 5500. If you're flush look at the 7100 or 7200. These are the top of the line in cropped sensor camera bodies. If you are a high roller and go straight to full frame cameras than good for you. But without the practice, practice, practice you won't do better with a $3000 body than the hard-working, practicing, shooting all the time, researching and YouTube instructional video watching guy or gal with the 3300 I first mentioned.
Just don't use a phone. Text, tweet, snapchat and even dial with it, but don't try photographs. Save the camera for quick snapshots and video of hamsters playing the piano.
MJ
.

Showing posts with label Nikon. Show all posts
Showing posts with label Nikon. Show all posts
Thursday, September 10, 2015
Wednesday, September 2, 2015
#65 - PHOTOGRAPHY 101 - APERTURE
I mentioned previously that I wanted to include another ongoing series that would focus (pun alert) on the basics of photography and how they apply to capturing images of arachnids. I want to try to do so in terms anyone can understand. Those who want technical information on photographic techniques will find them. There are plenty of good books and internet resources. My intention is to explain the core concepts I believe are necessary for successful arachnid and other small animal images, without delving into complicated physics and overly detailed discussion that will make you want to just stick to your smartphone. My series will assume that you have a DSLR (or even an old school film SLR); it won't be applicable to camera phones and point-and-shoots and I'll explain why in this first installment. If you're a technophobe don't skip this. Give me a chance to distill some photo info into laymen's terms or at least explain the concepts in concise, easy to understand language first. This lesson will not be short, but hopefully it will be easy to understand, especially if you ensure that you understand each paragraph completely before moving on and, if you're not sure, you read the paragraph again.
We are talking about macrophotography, which is basically taking pictures of small objects at short distances. I'm not going to get into the magnified "super macrophotography" of teeny tiny insects or spiders. I'm not going to be talking about focus stacking or other tricks. We're just going to be talking about photographing tarantulas (or scorpions, etc.) and using basic macro techniques to maximize things like depth of field, which is what APERTURE is all about. And aperture is this first installment's subject matter.
SLR stands for single lens reflex and, of course, DSLR stands for DIGITAL single lens reflex. Simply put, a single lens reflex camera uses a mirror and prism system so that you are looking directly at your subject THROUGH THE LENS. This is different than the point-and-shoot camera where you are looking through a viewfinder and seeing the subject slightly differently than will be captured by the film or digital sensor. When you use a smartphone you see what the lens is capturing on a screen and this is what is called "live view" on point-and-shoots or DSLRs (different manufacturer's have different names. I'm a Nikon guy so some of my terminology will be theirs. As we get further into this topic I will give the Canon equivalents, but for other maker's you'll have to look up the slight nomenclatural differences).
The simplest definition of APERTURE is that it is a hole through which light travels. Aperture can be a very technical subject if you get into things like cone angles and bundled rays and how collimated they are. But we don't give a flock about those. We're keeping it simple so all I want you to know is that your camera's aperture is related to how much light you are allowing to pass through the lens to the sensor. (I'm going to refer to sensor as I am assuming almost all of you are using DSLRs).
Aperture is measured by what are called f-stops. For example, f/2.8 and f/18. I'm going to use these two extremes to explain further. One thing that is hard for people to grasp is that the smaller the aperture the larger the number. Let's state that again. f/18 is a much smaller aperture than f/2.8. We'll skip the technical explanation. Just remember that each stop decreases the amount of light as you move from smaller number to larger number and that this increases the DEPTH OF FIELD.
Now depth of field is what aperture is all about. The smaller the aperture, the less light reaches the sensor and the greater the depth of field is. That means that more of the subject from the front to the back of the image is in focus. We don't need to burden ourselves with the physics involved. Just trust me.
Getting back to our f/2.8 and f/18 ... Large apertures like f/2.8 or even larger ones like f/1.4 or f/1.8 are highly popular with portrait photographers. They put a person's face in perfect focus while blurring the background in a pleasant way that is referred to as BOKEH. If you are photographing a group of people (e.g., a foursome) that aren't on a single plane (exact same distance from lens) you may have to go to, say, f/4 or f/5.6 to slightly increase the depth of field so all the people are in focus. When you buy a lens it is normally rated with its largest aperture (smallest number) as the largest aperture achievable by the lens is related to its quality and price. This is for lenses with FIXED FOCAL LENGTHS. This means that a 35mm lens only shoots at 35 mm. I have a Nikkor 35mm f/1.8 (a steal at $200 and great for portraiture). It can shoot at smaller apertures than the largest (f/1.8), but it cannot shoot at focal lengths longer than 35 mm. Then you have your zoom/telephoto lenses. These can adjust from a minimum focal length to a maximum focal length. For example, I have a Nikkor 18-200 mm f/3.5-f/5.6. This means that it's largest aperture is f/3.5 and that would be at shortest focal length (18 mm), but if I zoom out to 200 mm than my largest aperture becomes f/5.6. Very expensive zoom/telephoto lenses will have a single maximum aperture (f/stop) throughout its entire focal length range. Some of these cost as much as a good compact car. OK, let's get back to DEPTH OF FIELD.
The shortcomings of point-and-shoot cameras is that even if you put them in their macro mode (generally represented by a cute little flower icon) the smallest aperture is typically only f/8 (or greater) and that IS NOT sufficient for quality portraits of arachnids. I've joked in previous blog entries how I carry 30 pounds of camera gear while Guy walks up with his fancy point-and-shoot and quickly captures his images. His results are good, but they don't compare to mine. The benefit of his point-and-shoot was it's great zoom ability, which would be a $10,000 lens for me. However, those long range shots are lacking in detail and full of what we call NOISE. A point-and-shoot is no substitute for a DSLR. The point-and-shoot camera automatically raises the ISO to make the sensor more light sensitive and capture more light (that's a topic for another day) resulting in poor results due to what is called LUMINANCE NOISE. It is a small package of compromises that doesn't duplicate the performance of a DSLR.
So if f/8 is not good for macrophotography, what is? I can tell you that the majority of my macro shots are taken at f/18 using a Nikon 7100, which is a camera body among the highest end of their cropped sensor DSLR range. I can tell you that my bud Chad Campbell, a more accomplished photographer than I, also shoots most of his "macro" shots at f/18 using the same Nikon 7100. f/16 can be used for larger subjects and you may go as small as f/22, so we will focus on a range of f/16 to f/22 noting that f/16 and f/18 are more useful than f/22 for most photographers and most shots and that Chad and I both agree that f/18 is the "sweet spot" for our D7100s paired with the Tokina 100mm macro lens we both use.
So we are using small holes. That is, small apertures with larger f-stop numbers. That means we need good lighting as we are limiting what makes it to the sensor. I won't squeeze a discussion of lighting into this APERTURE article. Simply put, you need to get good light, with good diffusers OFF OR ABOVE the body of your camera. Built in speed lights will only give satisfactory results; they won't excel.
By using these small apertures we are maximizing DEPTH OF FIELD. We want as much of our small subject in focus as possible. My example of portrait photography was the exact opposite. We want our model's face in perfect clear focus, but we want the background to have that pleasant blurred bokeh. As a rule of thumb, most landscape images are taken at f/8 or f/9 and you focus on part of the landscape approximately one third of the distance between you and the background. This gives pleasing results. In fact, there is a photographic adage that when in doubt shoot everything at f/8. If you want the far background of a landscape to be detailed than you use a smaller aperture like we would for macrophotography. That is f/16 or smaller. Depth of field will make more sense when I show you a series of example photos using the exact same subject at the exact same distance at the end of this article.
So, by now you may be wondering about HOW TO CHANGE f/STOP. First thing you have to do is get your camera out of its AUTO MODE. This mode is a compromise that gives reasonable results for NOVICES but you are now going to be changing aperture and you have graduated to INTERMEDIATE. AUTO does all things OK, but nothing WELL. We want to tell the camera what to do now. We are edu-muh-cated. We are smarter than some Japanese machine. If you are a Nikon user rotate that dial to A (aperture). If you're a Canon user they make it a bit more complicated and call it "Av" (aperture value). You are now in APERTURE PRIORITY mode. Don't be scared, we're still going to trust the camera to do some things for us. We aren't going completely MANUAL. At least not yet. I will tell you that I do 90% of my shooting in aperture priority (again, that means my MODE DIAL is set to A). What this does is tell my camera, "Hey, bud, I am going to choose my own damn aperture and all I want you to do is choose what you think is the best shutter speed". Now if you have your ISO set to AUTO your camera buddy will also choose the ISO for you. However, I don't have my ISO set to AUTO. I want it as low as the light will allow and that is ISO 100 so I set that manually (again, this is beyond today's discussion). I use good lighting so I don't need extra light sensitivity from my camera's sensor. (ISO is similar/equivalent to what was ASA for film ... you old-timers will remember buying ASA 100 or 400 or 800, etc.). Now that we are in APERTURE PRIORITY MODE we can select f/16 or f/18 and then let the camera do everything else. Let's not go cowboy and go all MANUAL yet... You can set aperture several ways and I'll let you Canon (and other) people consult your own manuals. But for you wise Nikon users you usually rotate the command dial left for larger apertures (lower f-numbers) and right for smaller apertures (higher f-numbers). You should see these numbers display on your small LCD screen or on the large rear display if you are in INFO mode.
You now know a lot more about taking proper macro shots than most people do. I can tell you that I travel the world with a couple guys who buy macro lenses and then just leave their cameras in AUTO MODE. What a waste of money ... just buy a point and shoot and put in in "flower mode". You'd have better results at a fraction of the cost. If you do not understand APERTURE and DEPTH OF FIELD, and all of you should now, you are not taking good macro images.
That brings us to one last topic before I show you some example images and end today's lesson. Macro lenses. As I said, getting into lighting would be a topic of its own, but all of the above rambling assumes you have a MACRO LENS. The best value in macro lenses is the one Chad, I and other friends all use: The Tokina f/2.8 100 mm 1:1 macro that goes for around $400. You need to have a 60-100 mm lens made for macro (Nikon tends to call them micro). The 1:1 in our Tokina's name is ideal if you can afford it. It means that we can get "life size images". In other words, we are capturing actual size. A 1:2 lens captures images at "half life size". The Tokina we use has a minimum focus distance (how close we can get) of just under one foot and a maximum aperture of f/2.8 (again, that is in the lens name) with a minimum aperture of f/32. Without a macro lens your ability to capture quality images of small subjects is limited or impossible. Practice with what you have, but save the money for the Tokina I mentioned. It is by far the best lens at the best price.
So now let's look at the same spider photographed the same way at different apertures (f/stops). For the record, I am using my Nikon D7100 handheld at the same approximate distance with the camera set manually to ISO100 and in APERTURE PRIORITY MODE. The lens is the Tokina 100mm macro. The camera's computer will decide my shutter speed for these shots and I will include it in the photo description. For lighting I will be using a Nikon SB-900 mounted to the hot shoe with a Pocket Box 6" x 9" softbox diffuser. Everything else will stay the same from image to image except for aperture (f-stop). I'm sure the spider will move a bit (she did!) so it will not be posed exactly the same, but the distance between lens and subject will stay approximately the same. I will shoot at f/5.6, f/8, f/10, f/13, f/16, f/18 and f/20. A larger aperture like f/4 or f/2.8 would be crap, which the f/5.6 is, but only worse. I didn't bother going above f/20 as hopefully you can see that f/18 is superior to all the others. Unfortunately, the f/16 example is poorly focused and I don't have time to reshoot. Because I am using good lighting all the shots will have a shutter speed of 1/60 sec. Again, I am letting the camera set the shutter speed, but it did not change throughout the series of images. We'll cover shutter speed and how it relates to hand holding or tripod in a future lesson.
The subject is a juvenile female Harpactira pulchripes approximately 2.5" in diagonal legspan. Although I normally shoot only in RAW (another lesson, another day), I will be using completely unprocessed JPEG images for the photo examples at the end.
These images should reveal how important aperture is to macrophotography and why a point-and-shoot (or DSLR IN AUTO!!!!) cannot yield the same results. As I wrote, I use A (Aperture Priority, Av on Canon) for 90% of my photography. For spiders and snakes and such I am usually at f/16 to f/18. For landscapes I am typically at f/8 or f/9, but may go to f/16 or smaller if the scenery in the distance is the important subject. For portraits I use the largest aperture possible (smallest f-stop number). f/2.8 is very good, but f/1.4 or f/1.8 can produce the best bokeh.
In closing, I will remind you that a complete rundown on my camera rig is in Blog #12A. And remember, the greatest thing about digital photography is you can take as many images as you like for free. Practice. Experiment. Get this aperture thing down and then start thinking about composition and lighting. Macrophotography is fun and there are plenty of subjects both in your spider room and outside in your bushes. Capture images of the latter before winter comes. Happy shooting, MJ
The f/18 image puts the entire spider in focus with exceptional detail and no noise. Look carefully at the spider and the background in all of the images.
Hope you learned something new, MJ
We are talking about macrophotography, which is basically taking pictures of small objects at short distances. I'm not going to get into the magnified "super macrophotography" of teeny tiny insects or spiders. I'm not going to be talking about focus stacking or other tricks. We're just going to be talking about photographing tarantulas (or scorpions, etc.) and using basic macro techniques to maximize things like depth of field, which is what APERTURE is all about. And aperture is this first installment's subject matter.
SLR stands for single lens reflex and, of course, DSLR stands for DIGITAL single lens reflex. Simply put, a single lens reflex camera uses a mirror and prism system so that you are looking directly at your subject THROUGH THE LENS. This is different than the point-and-shoot camera where you are looking through a viewfinder and seeing the subject slightly differently than will be captured by the film or digital sensor. When you use a smartphone you see what the lens is capturing on a screen and this is what is called "live view" on point-and-shoots or DSLRs (different manufacturer's have different names. I'm a Nikon guy so some of my terminology will be theirs. As we get further into this topic I will give the Canon equivalents, but for other maker's you'll have to look up the slight nomenclatural differences).
The simplest definition of APERTURE is that it is a hole through which light travels. Aperture can be a very technical subject if you get into things like cone angles and bundled rays and how collimated they are. But we don't give a flock about those. We're keeping it simple so all I want you to know is that your camera's aperture is related to how much light you are allowing to pass through the lens to the sensor. (I'm going to refer to sensor as I am assuming almost all of you are using DSLRs).
Aperture is measured by what are called f-stops. For example, f/2.8 and f/18. I'm going to use these two extremes to explain further. One thing that is hard for people to grasp is that the smaller the aperture the larger the number. Let's state that again. f/18 is a much smaller aperture than f/2.8. We'll skip the technical explanation. Just remember that each stop decreases the amount of light as you move from smaller number to larger number and that this increases the DEPTH OF FIELD.
Now depth of field is what aperture is all about. The smaller the aperture, the less light reaches the sensor and the greater the depth of field is. That means that more of the subject from the front to the back of the image is in focus. We don't need to burden ourselves with the physics involved. Just trust me.
Getting back to our f/2.8 and f/18 ... Large apertures like f/2.8 or even larger ones like f/1.4 or f/1.8 are highly popular with portrait photographers. They put a person's face in perfect focus while blurring the background in a pleasant way that is referred to as BOKEH. If you are photographing a group of people (e.g., a foursome) that aren't on a single plane (exact same distance from lens) you may have to go to, say, f/4 or f/5.6 to slightly increase the depth of field so all the people are in focus. When you buy a lens it is normally rated with its largest aperture (smallest number) as the largest aperture achievable by the lens is related to its quality and price. This is for lenses with FIXED FOCAL LENGTHS. This means that a 35mm lens only shoots at 35 mm. I have a Nikkor 35mm f/1.8 (a steal at $200 and great for portraiture). It can shoot at smaller apertures than the largest (f/1.8), but it cannot shoot at focal lengths longer than 35 mm. Then you have your zoom/telephoto lenses. These can adjust from a minimum focal length to a maximum focal length. For example, I have a Nikkor 18-200 mm f/3.5-f/5.6. This means that it's largest aperture is f/3.5 and that would be at shortest focal length (18 mm), but if I zoom out to 200 mm than my largest aperture becomes f/5.6. Very expensive zoom/telephoto lenses will have a single maximum aperture (f/stop) throughout its entire focal length range. Some of these cost as much as a good compact car. OK, let's get back to DEPTH OF FIELD.
The shortcomings of point-and-shoot cameras is that even if you put them in their macro mode (generally represented by a cute little flower icon) the smallest aperture is typically only f/8 (or greater) and that IS NOT sufficient for quality portraits of arachnids. I've joked in previous blog entries how I carry 30 pounds of camera gear while Guy walks up with his fancy point-and-shoot and quickly captures his images. His results are good, but they don't compare to mine. The benefit of his point-and-shoot was it's great zoom ability, which would be a $10,000 lens for me. However, those long range shots are lacking in detail and full of what we call NOISE. A point-and-shoot is no substitute for a DSLR. The point-and-shoot camera automatically raises the ISO to make the sensor more light sensitive and capture more light (that's a topic for another day) resulting in poor results due to what is called LUMINANCE NOISE. It is a small package of compromises that doesn't duplicate the performance of a DSLR.
So if f/8 is not good for macrophotography, what is? I can tell you that the majority of my macro shots are taken at f/18 using a Nikon 7100, which is a camera body among the highest end of their cropped sensor DSLR range. I can tell you that my bud Chad Campbell, a more accomplished photographer than I, also shoots most of his "macro" shots at f/18 using the same Nikon 7100. f/16 can be used for larger subjects and you may go as small as f/22, so we will focus on a range of f/16 to f/22 noting that f/16 and f/18 are more useful than f/22 for most photographers and most shots and that Chad and I both agree that f/18 is the "sweet spot" for our D7100s paired with the Tokina 100mm macro lens we both use.
So we are using small holes. That is, small apertures with larger f-stop numbers. That means we need good lighting as we are limiting what makes it to the sensor. I won't squeeze a discussion of lighting into this APERTURE article. Simply put, you need to get good light, with good diffusers OFF OR ABOVE the body of your camera. Built in speed lights will only give satisfactory results; they won't excel.
By using these small apertures we are maximizing DEPTH OF FIELD. We want as much of our small subject in focus as possible. My example of portrait photography was the exact opposite. We want our model's face in perfect clear focus, but we want the background to have that pleasant blurred bokeh. As a rule of thumb, most landscape images are taken at f/8 or f/9 and you focus on part of the landscape approximately one third of the distance between you and the background. This gives pleasing results. In fact, there is a photographic adage that when in doubt shoot everything at f/8. If you want the far background of a landscape to be detailed than you use a smaller aperture like we would for macrophotography. That is f/16 or smaller. Depth of field will make more sense when I show you a series of example photos using the exact same subject at the exact same distance at the end of this article.
So, by now you may be wondering about HOW TO CHANGE f/STOP. First thing you have to do is get your camera out of its AUTO MODE. This mode is a compromise that gives reasonable results for NOVICES but you are now going to be changing aperture and you have graduated to INTERMEDIATE. AUTO does all things OK, but nothing WELL. We want to tell the camera what to do now. We are edu-muh-cated. We are smarter than some Japanese machine. If you are a Nikon user rotate that dial to A (aperture). If you're a Canon user they make it a bit more complicated and call it "Av" (aperture value). You are now in APERTURE PRIORITY mode. Don't be scared, we're still going to trust the camera to do some things for us. We aren't going completely MANUAL. At least not yet. I will tell you that I do 90% of my shooting in aperture priority (again, that means my MODE DIAL is set to A). What this does is tell my camera, "Hey, bud, I am going to choose my own damn aperture and all I want you to do is choose what you think is the best shutter speed". Now if you have your ISO set to AUTO your camera buddy will also choose the ISO for you. However, I don't have my ISO set to AUTO. I want it as low as the light will allow and that is ISO 100 so I set that manually (again, this is beyond today's discussion). I use good lighting so I don't need extra light sensitivity from my camera's sensor. (ISO is similar/equivalent to what was ASA for film ... you old-timers will remember buying ASA 100 or 400 or 800, etc.). Now that we are in APERTURE PRIORITY MODE we can select f/16 or f/18 and then let the camera do everything else. Let's not go cowboy and go all MANUAL yet... You can set aperture several ways and I'll let you Canon (and other) people consult your own manuals. But for you wise Nikon users you usually rotate the command dial left for larger apertures (lower f-numbers) and right for smaller apertures (higher f-numbers). You should see these numbers display on your small LCD screen or on the large rear display if you are in INFO mode.
You now know a lot more about taking proper macro shots than most people do. I can tell you that I travel the world with a couple guys who buy macro lenses and then just leave their cameras in AUTO MODE. What a waste of money ... just buy a point and shoot and put in in "flower mode". You'd have better results at a fraction of the cost. If you do not understand APERTURE and DEPTH OF FIELD, and all of you should now, you are not taking good macro images.
That brings us to one last topic before I show you some example images and end today's lesson. Macro lenses. As I said, getting into lighting would be a topic of its own, but all of the above rambling assumes you have a MACRO LENS. The best value in macro lenses is the one Chad, I and other friends all use: The Tokina f/2.8 100 mm 1:1 macro that goes for around $400. You need to have a 60-100 mm lens made for macro (Nikon tends to call them micro). The 1:1 in our Tokina's name is ideal if you can afford it. It means that we can get "life size images". In other words, we are capturing actual size. A 1:2 lens captures images at "half life size". The Tokina we use has a minimum focus distance (how close we can get) of just under one foot and a maximum aperture of f/2.8 (again, that is in the lens name) with a minimum aperture of f/32. Without a macro lens your ability to capture quality images of small subjects is limited or impossible. Practice with what you have, but save the money for the Tokina I mentioned. It is by far the best lens at the best price.
So now let's look at the same spider photographed the same way at different apertures (f/stops). For the record, I am using my Nikon D7100 handheld at the same approximate distance with the camera set manually to ISO100 and in APERTURE PRIORITY MODE. The lens is the Tokina 100mm macro. The camera's computer will decide my shutter speed for these shots and I will include it in the photo description. For lighting I will be using a Nikon SB-900 mounted to the hot shoe with a Pocket Box 6" x 9" softbox diffuser. Everything else will stay the same from image to image except for aperture (f-stop). I'm sure the spider will move a bit (she did!) so it will not be posed exactly the same, but the distance between lens and subject will stay approximately the same. I will shoot at f/5.6, f/8, f/10, f/13, f/16, f/18 and f/20. A larger aperture like f/4 or f/2.8 would be crap, which the f/5.6 is, but only worse. I didn't bother going above f/20 as hopefully you can see that f/18 is superior to all the others. Unfortunately, the f/16 example is poorly focused and I don't have time to reshoot. Because I am using good lighting all the shots will have a shutter speed of 1/60 sec. Again, I am letting the camera set the shutter speed, but it did not change throughout the series of images. We'll cover shutter speed and how it relates to hand holding or tripod in a future lesson.
The subject is a juvenile female Harpactira pulchripes approximately 2.5" in diagonal legspan. Although I normally shoot only in RAW (another lesson, another day), I will be using completely unprocessed JPEG images for the photo examples at the end.
These images should reveal how important aperture is to macrophotography and why a point-and-shoot (or DSLR IN AUTO!!!!) cannot yield the same results. As I wrote, I use A (Aperture Priority, Av on Canon) for 90% of my photography. For spiders and snakes and such I am usually at f/16 to f/18. For landscapes I am typically at f/8 or f/9, but may go to f/16 or smaller if the scenery in the distance is the important subject. For portraits I use the largest aperture possible (smallest f-stop number). f/2.8 is very good, but f/1.4 or f/1.8 can produce the best bokeh.
In closing, I will remind you that a complete rundown on my camera rig is in Blog #12A. And remember, the greatest thing about digital photography is you can take as many images as you like for free. Practice. Experiment. Get this aperture thing down and then start thinking about composition and lighting. Macrophotography is fun and there are plenty of subjects both in your spider room and outside in your bushes. Capture images of the latter before winter comes. Happy shooting, MJ
 |
| 100mm, f/5.6, 1/60 sec, ISO 100 |
 |
| 100mm, f/8, 1/60 sec, ISO 100 |
 |
| 100mm, f/10, 1/60 sec, ISO 100 |
 |
| 100mm, f/13, 1/60 sec, ISO 100 THIS IMAGE IS A BIT OUT OF FOCUS AND IS A POOR EXAMPLE |
 |
| 100mm, f/18, 1/60 sec, ISO 100 |
 |
| 100mm, f/20, 1/60 sec, ISO 100 |
The f/18 image puts the entire spider in focus with exceptional detail and no noise. Look carefully at the spider and the background in all of the images.
Hope you learned something new, MJ
Tuesday, August 11, 2015
#55 - PHOTOGRAPHY
At the Minnverts gathering this past weekend I was with two serious and skilled photographers: Chad Campbell and Michael Pankratz. As many of you know, Chad is a moderator on Arachnoboards and is better known there as "advan". He mentioned that he had been spending some time improving on the photography subforum there. Since I no longer am on FriendFace, FaceBlock, Faffbook, Fuckbook or Fussbook, I no longer have that outlet for easily sharing images and may resume my "New Michael Jacobi Photo Thread" on AB. However, these are, and will be, watermarked 72 dpi compressed images. I just wanted to remind you that my real galleries, where you can view high resolution images (still at screen resolution though) without watermark, is at exoticfauna.smugmug.com. Please bookmark and revisit every now and again. These are my complete galleries and you can even order prints.
I'd love to share some info on photography skills and possibly turn that into another ongoing series, but here I just wanted to post a few images of spiders that I am packing for customers today and make a few comments on spider portraits and photography in general.
First, for the gear heads, in an earlier blog entry (#12A - PART ONE: SUNDAY, FUN DAY) I mentioned some of the arachnocultural products I use and where to get them cheap. It was just a listing of things I recommend without any endorsement or free product in return. I closed that installment with my camera rig details and I will copy and paste that here.
Camera Rig: The majority of the photos you see me post are taken with a Nikon D7100 body and a Tokina 100mm 1:1 2.8 macro lens. 90% of the images are shot in aperture priority mode at f18 and ISO100 and usually 1/60 sec. Sometimes I go fully manual if I want to select shutter speed a bit, say to 1/125 sec or maybe adjust ISO to 200 or 400. Smaller subjects are usually lit with a Sigma EM-140 ring flash, while larger spiders are lit with a PocketBox Mini Softbox on a SB900 speedlight in the hot shoe. I often use TTL, but may set ring flash to TTL BL or manually reduce output on SB900 or use only one side of the ring flash in certain situations. I never, ever, ever use the camera's built-in mini speedlight. They are taped down! For photography other than spider and herp portraits I use Nikkor's 17-55mm 2.8, 35mm 1.8 and 18-200 VR 5.6. For human portraits I light subject with a Gary Fong Lightsphere mounted on the SB-900 or a SB-600. When in the field if I need to have two set-ups at the ready I use my old Nikon D90 body with the macro lens and flash and use the D7100 with the 17-55 or 18-200.
I shoot both RAW and Fine JPEG, but normally use the RAW file imported into Adobe Lightroom 6/CC on a MacBook Pro for processing. Photoshop CC is used for background removal or to remove unwanted dirt or something from the image. I export my finished images as TIF to an external hard drive and Fine JPEG (6000 x 4000 pixels) to my internal hard drive (these go to SmugMug) and make a 1280 pixel wide watermarked and branded version using both Lightroom and Adobe Fireworks for posting on social media. My full resolution photo galleries are at exoticfauna.smugmug.com where you can order prints.
The important detail above is that I "never, ever, ever use the camera's built-in mini speed light". If you are shooting with a decent DSLR get your flash above or off the camera body. Use soft boxes on speed lights on brackets, arms or held on a sync cord or mounted on a tripod. I will go into further detail in future blogs. However, your built-in flash gives direct, unnatural and unflattering light. You can have some reasonable results and I know at least one photographer who posts tons of decent tarantula pix using this on camera flash. But a trained eye can pick out the poor lighting and the resultant problems with shadows and highlights. Some of these could be corrected in post-production when shooting RAW, but it is best to capture the best data first.
I used to use my ring flash for everything, but it broke a few months ago thanks to my clumsiness and while waiting for it to be repaired I began using my tall SB900 speed light with the Pocketbook Mini Softbox. I normally use this set-up for snakes and lizards and larger creatures on field trips, but it is now my go to method for adult tarantulas and all the pix below were taken with a Nikon D7100 with a SB900 flash on TTL or TTL BL with the softbox. I use the ring flash for small subjects only now. All of the below photos were taken handheld at f/18 at 1/60 sec. Lightroom was used to process the RAW files and add some clarity, adjust white balance and add a bit of vignetting.
Now that I've talked about gear, let's forget all about expensive toys. Yes, if you want to get serious about photography, and especially macrophotography, you need to get at least a midrange DSLR and a bunch of money-sucking add ons. The Tokina 100mm 1:1 macro lens is the best bang for your buck and you'll need lighting other than what your camera possesses. However, to turn a snapshot into a photograph is all about COMPOSITION, COMPOSITION, COMPOSITION. If you are limited to a point and shoot or even a camera phone you needn't worry about f-stops and focal length and such. You should concentrate on composition and making the best use of available light. Google the rule of thirds and other compositional rules. You can break these later, but master them first. Even if you are just taking a selfie for Instagram think about composition. Take sunglasses off (always!), use the rule of thirds, avoid harsh midday light and shadows, try different angles, get artsy. Think about background. Turn your snapshot into a photograph.
Again, all of these photos were taken this morning and all of these spiders were packed to ship to new homes. For many more images of arachnids, reptiles and other creatures, both in nature and the terrarium and without watermarks, please visit my Smugmug. Enjoy, MJ
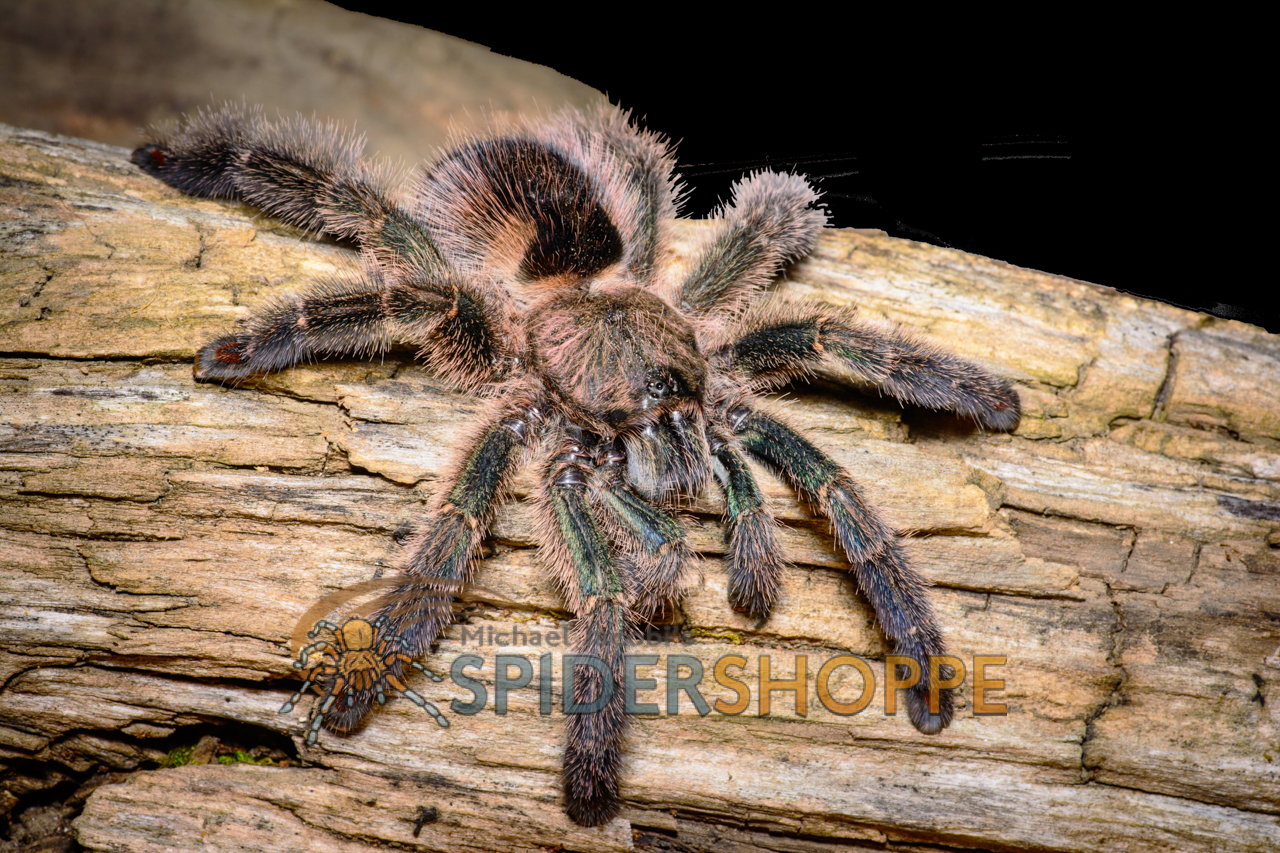
 |
| Psalmopoeus cambridgei x irminia This spider was offered free and shipped to A.W. with the restriction that it never be bred or sold. |
 |
| Psalmopoeus cambridgei on its way to A.W.'s mom. Compare this spider to the hybrid above. |
 |
| This adult female Iridopelma hirsutum 'Recife' is also on its way to A.W. |
 |
| T.R. is receiving this adult female Avicularia diversipes |
 |
| This female Lampropelma nigerrimum headed to T.R. was a complete bitch! This is the best photo I could capture and you'll notice her spread "jaws" and raised legs. She alternated between threat posture and biting my forceps to doing the drop and roll. I'm sure some of you are familiar with how these spiders will just roll into a ball and drop off the wood. In fact, T.R. is also getting a Lampropelma sp. Borneo, but I couldn't even get her to pose for one second. Many Ornithoctoninae are stubborn models and I lose my patience quickly. |
 |
| This adult female Avicularia minatrix on her way to T.R. was much more cooperative. At first, that is. Unfortunately, I clipped Leg II left in the photo and after the exposure she ran into a crevice in the driftwood. I had to break my long-used photo background wood in half to get her out. Now, I need a new piece. I was starting to question why I was making packing harder by shooting these photos! |
 |
| D.D. is receiving this beautiful subadult female Avicularia sp. Peru tomorrow. I had to prop up half of my now split in two driftwood background. D.D. got some other Avics too, but most were young specimens and I had had enough camera for the day. |
Sunday, June 14, 2015
#12A - PART ONE: SUNDAY, FUN DAY - A P.S.A.
This afternoon I pick up the Pennell family at O'Hare International Airport. Coincidentally, it is flag day. I am sure they will enjoy the patriotic displays including my two cheap little flags. In the UK you aren't allowed to fly your own flag. Can you fucking believe that shit? It is unlawful to offend the immigrants with your national pride. For fuck's sake.
It's also Chad Campbell's birthday. Cheers mate! We raise our glasses on Friday!
Last Sunday I asked for some questions. I was allowing an opening for you to coerce me into stirring up some shit, but I guess I'm ranty enough. Nobody has provoked me.
One type of question I do get often is related to products I use, especially my substrate choice and other husbandry related kit. Not to be a NASCAR racer or Bassmaster pro and fly the colors of product endorsements, but I'll tell you what things I buy to keep, breed, and sell tarantulas and where I get them with the best price and best service. I receive no compensation. Consider it a public service announcement, not an advertisement or endorsement for anything or anyone. I also get asked about my camera rig all the time so I'll give the basics at the end for you photog phreaks.
#1 - I use coconut coir. Specifically, Zoo Med EcoEarth. I expand the bricks with exactly three 32 oz. cups (i.e. 3 quarts) of very warm tap water. I first set the brick standing on its long end in a bus tub (or wash tub or 5 gallon bucket), not lying flat. An hour later I chop and stir up the expanded moist substrate with a $5 Fiskars plastic trowel from Target, and then usually let it air dry a bit overnight before I stir again and use.
There are many reasons I prefer coco and one is that it is a "green" product made from the waste of the coconut industry. Other choices may be less environmentally responsible, such as peat moss, which is mined from bogs and has an impact on nature. Used substrate can be composted.
While EcoEarth covers most of my coco needs I do use one other type. I also use Coco Soft (Blue Iguana). It is a coarse, fibrous coco product that is sold loose. For drier climate spiders such as my M. balfouri, Idiothele mira and my Harpactira collection, I like to add an inch of this on the top of the fine, moistened EcoEarth. I usually also add dry moss (favorite is Zilla Beaked Moss) and some live oak leaves (from terrarium supply places like Josh's Frogs or Pangaea Reptile, etc.). At other times I will mix equal parts expanded EcoEarth with the Coco Soft and then remoisten the mix. The fibers of the CocoSoft contribute to structural integrity for burrow and retreat formation.
Speaking of burrows, I use cork bark or Fluker's Critter Cavern set into the substrate at an 30° angle to give a retreat and burrow start for my Africans. When I used to keep Asian terrestrials they were in deeper tubs and the vertical burrow was started with a piece of broomstick or pipe in the corner before filling with substrate.
#2 - I use ExoTerra Terrariums. The Nano Tall size is perfect for Pachistopelma and small Avics like A. rickwesti and A. hirschii and even A. diversipes. The Mini Tall are great for any arboreal and mine hold Poecilotheria. I also use 10 gallon aquariums stood on end that have had hinged door fronts with two 2" vents at top made out of polycarbonate to my specifications by Eric's Plastic Shop. But I also use a variety of plastic storage containers, cereal containers and the like. Most are customized with substantial ventilation covered by aluminum mesh insect screening (affixed with hot glue from outside). I use a variety of deli cup sizes. I love the 6" diameter and 4" high pre-punched clear cups for raising juvenile terrestrials, but also use plastic shoeboxes with a 1" hole at each end covered by screen. I use 32 oz. deli cups extensively and often choose well ventilated "fruit fly" style cups for many species. I keep many spiderlings in 50 dram vials (ThorntonPlastics.com). For short term (spiders for sale) I punch numerous air holes, but my keeper spiders have a one inch hole drilled in the lid that is, again, covered from the outside by aluminum insect screen affixed by hot glue. VENTILATE! VENTILATE! VENTILATE!
#3 - I've preached against crickets. I've spent years using mostly roaches. But I am back to the convenience that crickets afford me. The reasons will be covered in their own blog #14. How about tomorrow? I feed the crickets Fluker's High-Calcium Cricket Food. For water I make my own cricket quencher with polyacrylamide crystals I buy in bulk from watersorb.com. One 2 oz. condiment cup of crystals to one gallon of water and PRESTO! Cheap and easy cricket hydration. I do not offer the crickets any other food or water. I use fruit flies for baby true spiders like Cupiennius and Heteropoda and I dust those with Repashy Supervite Micro-fine Vitamin Supplement. I don't know that it helps nutritionally, but it does make it harder for the little buggers to move and that is helpful when you're trying to quickly put a few fruit flies in a vial with a spider that can teleport. I make my own fruit fly (D. melanogaster only) cultures using Josh's Frog's Melanogaster Formula or Repashy SuperFly. These are both nutritious media that makes the flies a healthy meal. Fruit flies that are cultured on the old school potato flakes and powdered sugar aren't exactly health food. As soon as possible I switch to pinhead crickets that I hatch myself.
#4. What else? I hate water spots so I mist with distilled water. I used to use R.O. and that's cool too. I just got sick of remembering to bring my empty 5 gallon carboy to store to refill and then having to lug it around full. I just get 87 cent gallons of distilled at the dreaded Wal-Mart.
#5 - Essential Tools - 1.5 or 2 quart pump up garden spray bottle (manually squeezing is tiresome), water bottle to pour from, oil funnel with long tip for moistening lower levels of substrate in large enclosures, 3ml pipettes for moistening substrate in vials, an assortment of artist brushes from tiny to 1" wide for gently directing spiders where I want them to go, rubber tipped forceps of assorted lengths, fine tip forceps of varying lengths, wood chopstick for poking starter burrows in vials or poking around a cup or enclosure, wooden spoon and spatula for manipulating and shielding larger spiders, razor blade window scraper for getting dry arboreal tarantula shit off the glass, catch cups, one liter and two liter soda bottles with large end cut off for catching and moving larger spiders, LED flashlight, headlamp, etc. etc. I also highly recommend Post-It Label Roll with removable adhesive and a Sharpie Retractable Ultra-fine marker for labelling and keeping notes and records on enclosures. If you keep itchy New Worlds keep Benadryl spray nearby for immediate topical use on contacted area and keep antihistamine pills in stock in the medicine cabinet. Some use masks and gloves as well. My prevention is easier. I just ban itchy spiders from my house ;)
SOURCES: I love PetSolutions.com. Any order over $49 ships free. They are in Ohio (I think?) and I get my orders in two days with the free economy shipping. They have ExoTerra terrariums cheap, I pay $5 for a 3-pack of EcoEarth, and they also sell Beaked Moss, Fluker's Cricket Diet and Critter Caverns, Coco Soft, etc. I also love their $1.49 small Ampallo ExoTerra terrarium plants (and the other ExoTerra faux greenery as well). Helluva deal. Plus they've got everything you need for your other pets at great prices. I get an order every two weeks. All the plastic containers I use come from Wal-Mart. I used to boycott the place (if you want to know why watch "High Cost of Low Prices" on Netflix). But it is the best place for gallon jars (I love the squarish Mainstays gallon jars and have loads! I use a 2.5" hole saw to remove most of the lid and then hot glue some screening over the opening). I also like the large, handle-less cereal container for Poecs and the Homz tubs that my African tarantulas are housed in. I already mentioned Thornton for cases of vials. If you can't use a case quantity you can get smaller amounts from SuperiorShippingSupplies.com. That is where I get all my deli cups and shipping boxes. I also use their approved FedEx shipping service to save money and ship under the banner of an approved shipper. You should have read all about this a few posts ago. I used to buy cork bark in bulk from Maryland Cork, but now pick it up at a local show from Pangaea Reptile who has great deals and it allows me to hand pick my pieces. I also buy my Repashy products from them and sometimes ExoTerra Terrariums at an even better price than Pet Solutions.
SOURCES: I love PetSolutions.com. Any order over $49 ships free. They are in Ohio (I think?) and I get my orders in two days with the free economy shipping. They have ExoTerra terrariums cheap, I pay $5 for a 3-pack of EcoEarth, and they also sell Beaked Moss, Fluker's Cricket Diet and Critter Caverns, Coco Soft, etc. I also love their $1.49 small Ampallo ExoTerra terrarium plants (and the other ExoTerra faux greenery as well). Helluva deal. Plus they've got everything you need for your other pets at great prices. I get an order every two weeks. All the plastic containers I use come from Wal-Mart. I used to boycott the place (if you want to know why watch "High Cost of Low Prices" on Netflix). But it is the best place for gallon jars (I love the squarish Mainstays gallon jars and have loads! I use a 2.5" hole saw to remove most of the lid and then hot glue some screening over the opening). I also like the large, handle-less cereal container for Poecs and the Homz tubs that my African tarantulas are housed in. I already mentioned Thornton for cases of vials. If you can't use a case quantity you can get smaller amounts from SuperiorShippingSupplies.com. That is where I get all my deli cups and shipping boxes. I also use their approved FedEx shipping service to save money and ship under the banner of an approved shipper. You should have read all about this a few posts ago. I used to buy cork bark in bulk from Maryland Cork, but now pick it up at a local show from Pangaea Reptile who has great deals and it allows me to hand pick my pieces. I also buy my Repashy products from them and sometimes ExoTerra Terrariums at an even better price than Pet Solutions.
Camera Rig: The majority of the photos you see me post are taken with a Nikon D7100 body and a Tokina 100mm 1:1 2.8 macro lens. 90% of the images are shot in aperture priority mode at f18 and ISO100 and usually 1/60 sec. Sometimes I go fully manual if I want to select shutter speed a bit, say to 1/125 sec or maybe adjust ISO to 200 or 400. Smaller subjects are usually lit with a Sigma EM-140 ring flash, while larger spiders are lit with a PocketBox Mini Softbox on a SB900 speedlight in the hot shoe. I often use TTL, but may set ring flash to TTL BL or manually reduce output on SB900 or use only one side of the ring flash in certain situations. I never, ever, ever use the camera's built-in mini speedlight. They are taped down! For photography other than spider and herp portraits I use Nikkor's 17-55mm 2.8, 35mm 1.8 and 18-200 VR 5.6. For human portraits I light subject with a Gary Fong Lightsphere mounted on the SB-900 or a SB-600. When in the field if I need to have two set-ups at the ready I use my old Nikon D90 body with the macro lens and flash and use the D7100 with the 17-55 or 18-200.
I shoot both RAW and Fine JPEG, but normally use the RAW file imported into Adobe Lightroom 6/CC on a MacBook Pro for processing. Photoshop CC is used for background removal or to remove unwanted dirt or something from the image. I export my finished images as TIF to an external hard drive and Fine JPEG (6000 x 4000 pixels) to my internal hard drive (these go to SmugMug) and make a 1280 pixel wide watermarked and branded version using both Lightroom and Adobe Fireworks for posting on social media. My full resolution photo galleries are at exoticfauna.smugmug.com where you can order prints.
Cheers, Salud, Skål, Prost, Santé, L'Chaim, MJ
Subscribe to:
Posts (Atom)